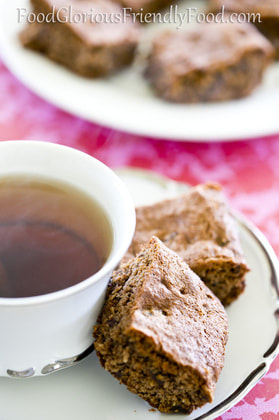
 Gluten free - grain free - dairy free - refined sugar free - additive free - vegetarian Banana flour is a gluten free flour, but has a few advantages over other gluten free flours. Firstly, it's not only gluten free but also grain free- great for all you Paleo eaters out there! Secondly, it's not a nut-based gluten free flour- great for those with tree nut allergies). Thirdly, it's a Resistant Starch. My attempt to explain what this means is as follows: Resistant starch is resistant to the digestive enzymes in the stomach and small intestine, so it is not absorbed there like most other starches, and makes it all the way to the large intestine, acting like dietary fibre. The benefits of this include: -keeping your bowels 'regular' -reducing the chance of colon cancer -doesn't give your body an instant glucose hit like other starches, and then the associated sugar-low afterwards (ie it's very low G.I.) -keeps you feeling full for longer -reduces fat storage after a meal that it is consumed -promotes increased mineral absorption compared to other starches, especially calcium and magnesium -promotes good bacteria off the gut (they can feed off it) No other food contains as much resistant starch per serve as bananas! Second in the running is rolled oats. Unlike many other gluten free flours that require altering recipes drastically to achieve the non-gluten-free comparison, it's easy to replace regular flour in your favourite recipes. You use 3/4 cup of banana flour for every cup of wheat flour in the recipe, make sure you use baking powder or soda, and add one extra egg (or equivalent soaked chia seeds). This recipe was a childhood favourite of mine. We called it Sultana Slice and it's in a hand-written in a book of recipes I transcribed from my Mum's when I left home. I've been wanting to give it a gluten/dairy/sugar-free make over for a long time and the banana flour has helped to keep it excitingly close to the original taste and texture. And, by the way, it doesn't taste like banana! I hope you enjoy it as much as I do! Ingredients:
Method:
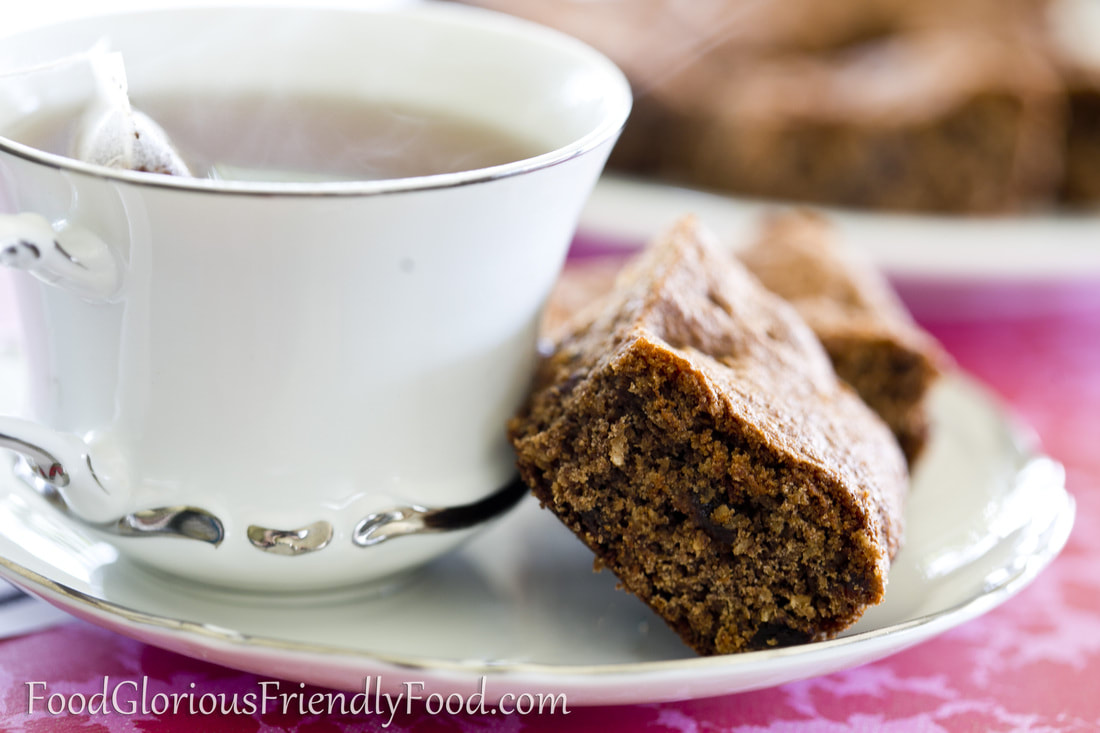
 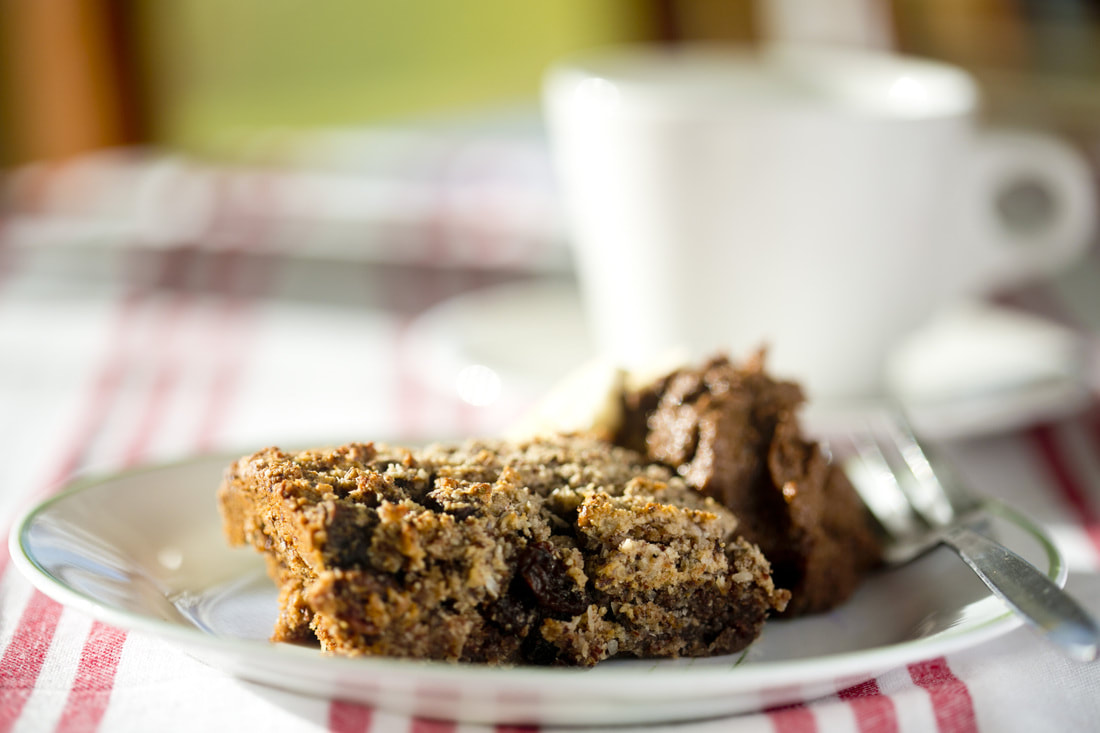 Gluten free - grain free - dairy free- refined sugar free - egg free - vegetarian In my continuing quest to help inspire you all to make interesting, healthy, filling, ' Friendly' breakfasts, I suddenly had the inspiration to convert a cookie recipe that I make regularly make something more breakfast-like. The original recipe had egg in it and I decided I wanted to try and make it egg-free for those with egg allergies. Replacing the egg with Chia worked really well. Of course, this doesn't have to be eaten for breakfast. It's pretty sweet (although only sweetened with honey) and these make a great lunch box snack too. When eating for breakfast, I cut the slice into 12 pieces, but if using for a snack, I'd make it into 24. It's really filling! I have it pictured above with some Chocolate Avocado Mousse. For something more indulgent you could replace the dried fruit with 100g of dark chocolate (says the chocoholic!!) 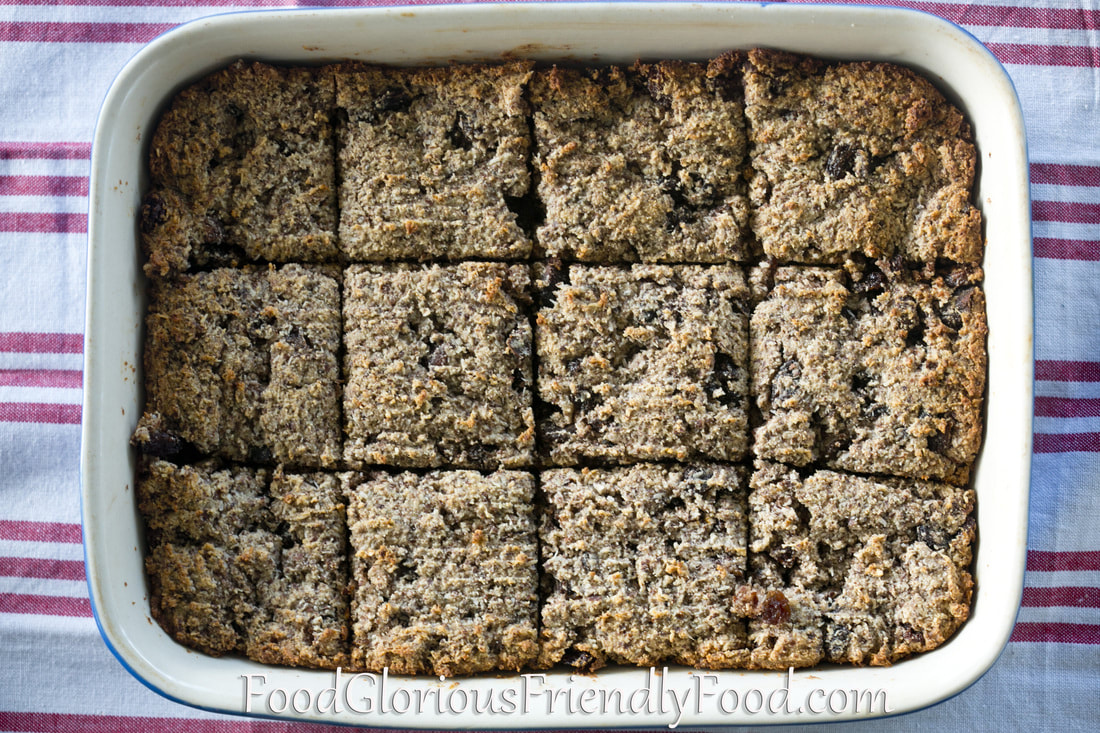 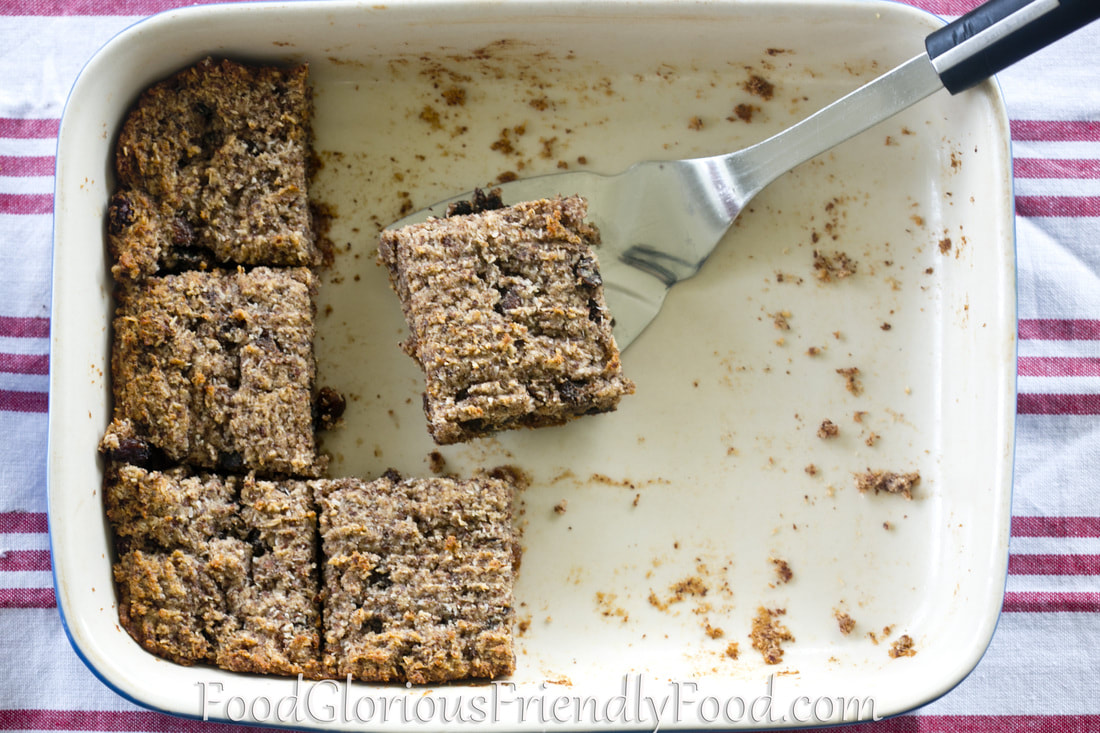 Serves 12 for breakfast, or 24 as a snack. Ingredients
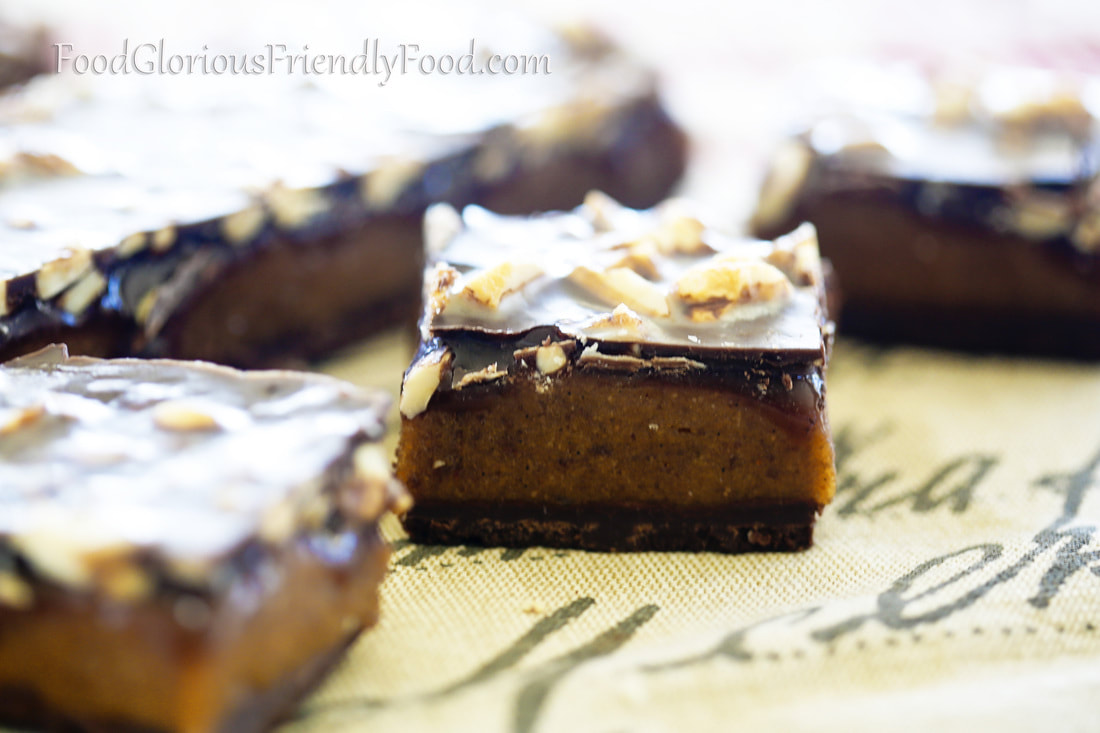
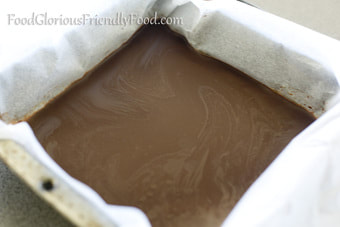
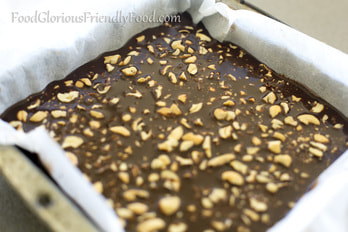
For more snack ideas, scroll through my recipes here.  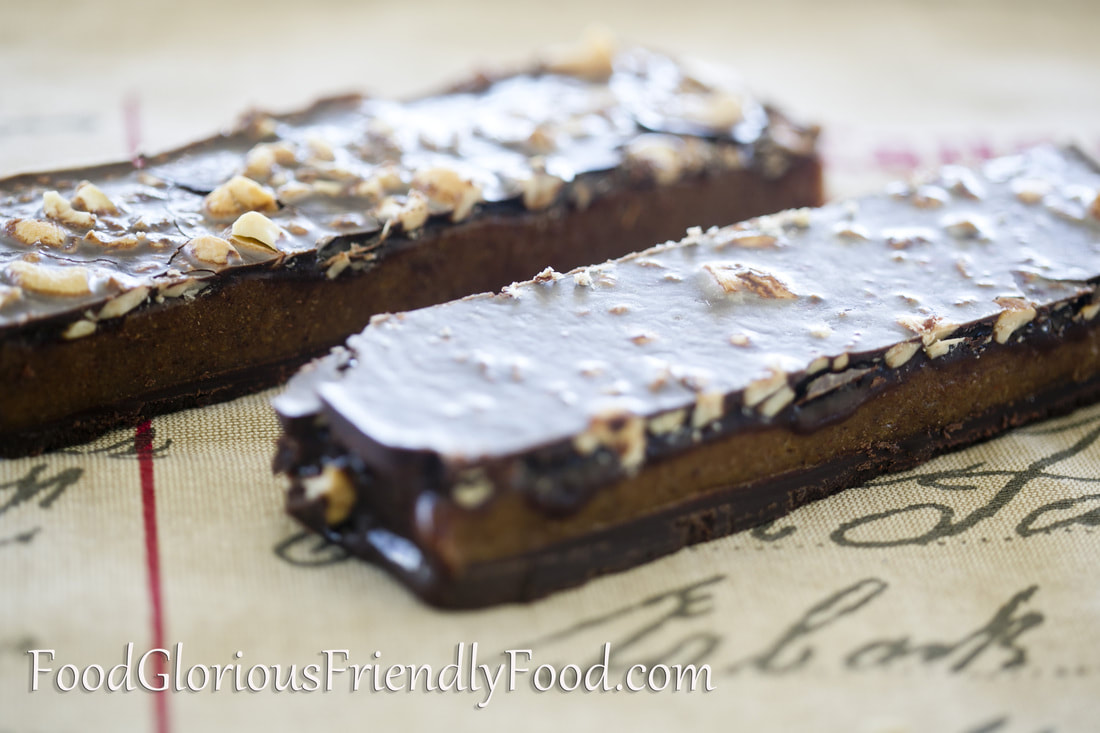 Gluten free - grain free - dairy free - refined sugar free - egg free - additive free - vegetarian I hope you're as excited about this as I am!! After four batches and a few too many calories in the stomachs of my family, I've finally found a balance of flavours that I LOVE! Of course, it is free from gluten, dairy and refined sugar. It is additive and preservative free if you use additive free vanilla and organic medjool dates. It's grain free and egg free too! I was originally inspired by a blog post that was going around on Face book that had a heap of 'healthy chocolate bars'- recreations of some of the most popular you can buy. I was lured in by the 'Snickers' recipe. I made it and was frankly underwhelmed. It tasted nothing like a snickers (in my humble opinion). Don't get me wrong, it was actually really nice, but I have a problem with creating a healthy version of an iconic food and then giving it the same name when it really doesn't resemble the original at all. What it did do was inspire me to create my own little chocolate bar and this is what I've come up with! I have mentioned before that I'm a sucker for eating sweet and savoury together (my most classic example is eating salt and vinegar chips in the same mouthful as chocolate), so Salted Caramel is a no-brainer for me. It's sweet/savoury heaven. I just had to come up with a caramel consistency that was firm enough to hold it's shape in a bar, but soft and gooey enough to actually resemble caramel. And then there was the chocolate- my first attempt at making my own rather than melting down dark chocolate. I consulted a few other recipes and it took a few attempts make adjustments and find a flavour I was happy with. The ingredients are simply cocoa butter, coconut oil, cocoa (or cocao) powder and raw honey. I get my cocoa butter from my local organic food store. You can also find it online. If you don't want to use cocoa butter, you can replace it with more coconut oil. I have made it this way and personally find the coconut oil flavour a little to much in that quantity, but it will still work for this chocolate bar. I prefer raw honey for all it's amazing nutrients (the heating that most supermarket honey undergoes is done to stop it crystallising, but it destroys most of the nutrition). In this recipe the honey will get heated slightly in order to be able to whisk it into the other ingredients, but not so much to kill off all its goodness. Having said all that, you could use melted 70% cocoa (dairy free) chocolate for this recipe if you don't want to make your own. I'd recommend using 2 x 100g bars - one for the top and one for the bottom. Anyway, enough explanations...let's get on with the cooking!! Ingredients For the caramel:
|