FOOD, GLORIOUS FRIENDLY FOOD
  • Home
  • Recipes
  • About Me
  • Weight and Temperature Conversions

 Food, Glorious Friendly Food  

Recipe Categories

All
Baked
Beef
Biscuits And Slice
Breakfast
Cakes Muffins Brownies
Chicken
Chocolate
Christmas
Dinner
Dips And Sauces
Drinks & Ice Blocks
Easter
Fruit
Lunch
Lunch Boxes
Meat
Paleo
Pastry
Pork
Preserves
Raw
Salad
Seafood
Snack
Soup
Sweet
Vegetarian

Friendly food for Chocoholics

Christmas Spiced Nuts

17/11/2019

 
Picture
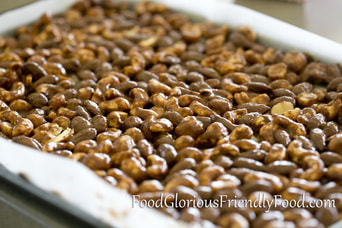
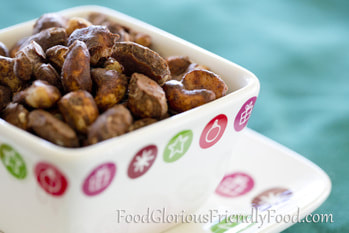
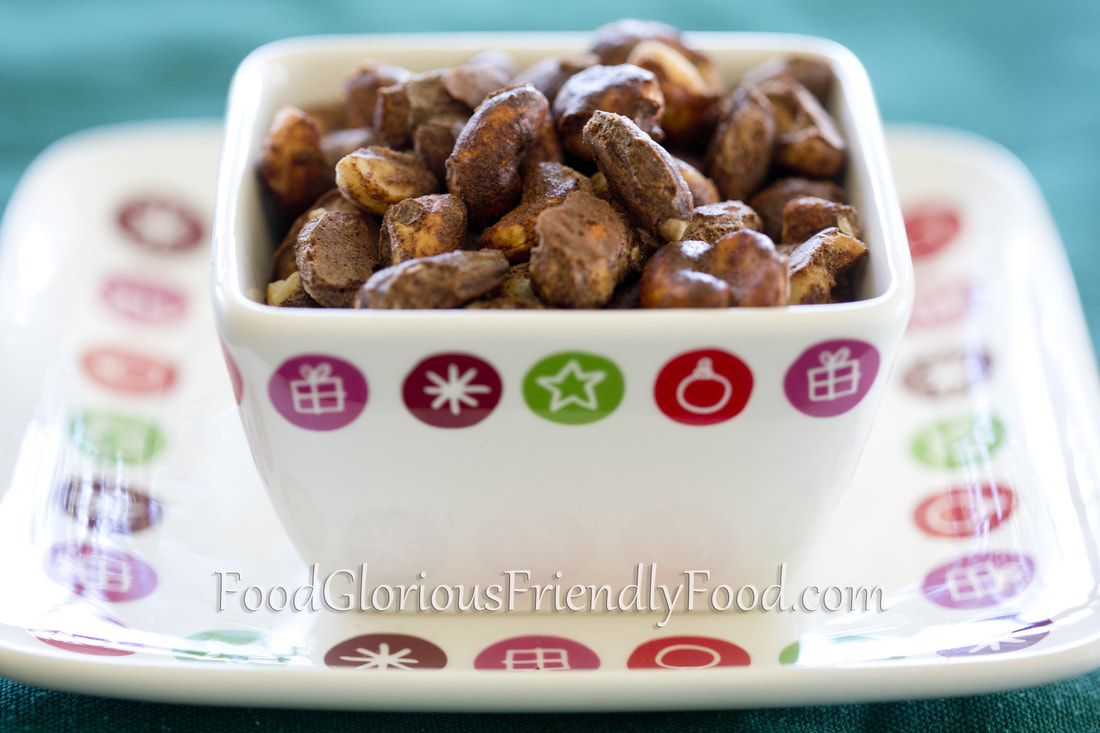
Gluten free - grain free - dairy free - refined sugar free - vegetarian - contains egg and nuts
    I'm excited about this one!  I'm rather partial to a nice sugary coated nut!  Here's a wonderfully Christmassy version of sugar coated nuts....made with Coconut Sugar rather than refined sugar.
   Coconut Sugar is made by tapping the stems of the coconut palm, extracting the sap, and then dehydrating it at very low temperatures.  This minimal amount of processing produces a nutrient and mineral-rich product with a great toffee-like taste.  It has a low GI (about 35, compared with refined sugar's 68), providing a slow energy release for your body.  It's also a very sustainable product- once a stem is tapped, it flows for the next 20 years.  You can use it measure-for-measure to replace sugar in baking.
    Coating the nuts with egg white produces a crispy-crunchy coating and the spices I've used just scream 'Christmas' to me...I hope you love them as much as I do! 
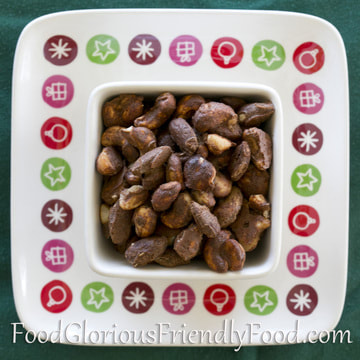
Picture
Ingredients:
  • 500g (1 pound) mixed nuts.  Choose your favourite mix or just one type of nut- it's up to you!  I use 100g macadamias, 200g cashews, 200g almonds.  You can use raw, or activated, or roasted nuts...whatever you're into!
  • 2 large egg whites
  • 3 tablespoons coconut sugar (you could also use rapadura)
  • 4 teaspoons ground cinnamon
  • 1 teaspoon ground cloves
Method:
  • Preheat oven to 180 degrees Celsius (350F).
  • Line a large baking tray/cookie sheet with baking paper.
  • In a large bowl, whisk the egg whites with the cinnamon and cloves and coconut sugar until all are just incorporated and there are no lumps.  A hand whisk or fork is fine- no need to use electric beaters.
  • Add the nuts and stir until the nuts are evenly coated.
  • Spread evenly over the lined baking tray, making sure the nuts are in one layer.
  • Place tray in the oven at a level as far away from the element or gas as possible (my oven has gas at the base so I place the tray on the top shelf).
  • Back for 18-20 minutes, ensuring the nuts have a crisp coating but are not burning.
  • Remove from oven and cool completely before storing in an airtight container. 
  • Serve them for Christmas nibbles or pop them in little jars and give them gifts.
  • For other Christmas food ideas, scroll through the list here.

Pumpkin Pie- Gluten and Dairy Free

17/11/2019

 
Picture
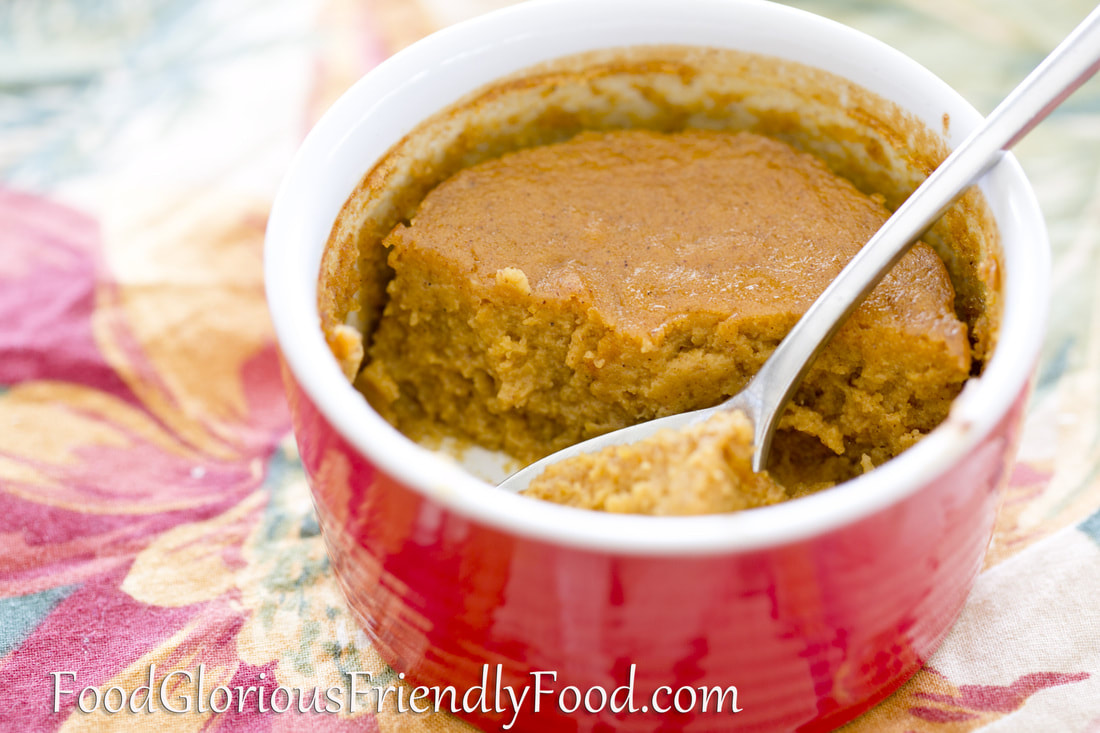
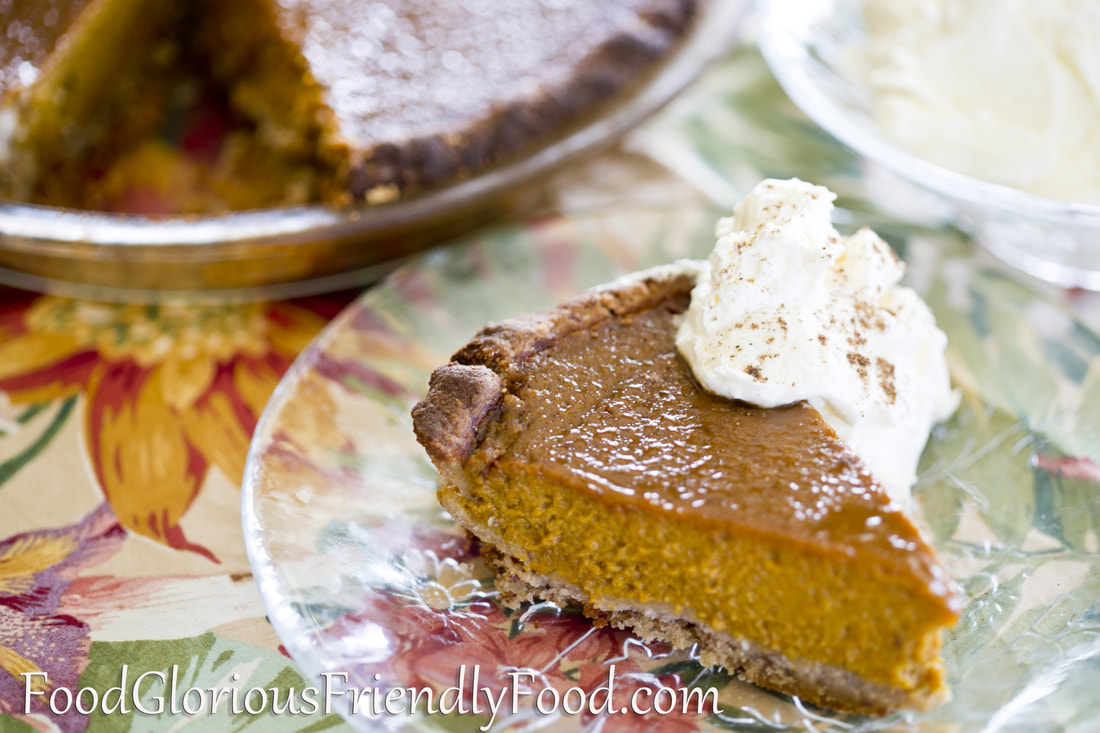
Gluten free - dairy free - refined sugar free - additive free - vegetarian - grain free option available
    
I can already here you asking... Why is an Aussie blogger writing a pumpkin pie recipe?  Settle in and let me tell you a little more about me.  This one's going to be from the heart.
    You may remember from my Kau Kau Bake Recipe that I grew up in Papua New Guinea.  For six of those years I lived in a little town called Ukarumpa.  It was basically a little American oasis in the middle of the Mountains of PNG!  There were people from all over the world who congregated there and made it their home, but US Citizens were definitely the majority.  My best friend was American.  I learnt much of the American way of life from her and her family.  I ate Pringles chips and Hershey's chocolate and Skittles lollies before it they had ever been heard of in Australia. I learnt how to roll my R's and elongate my vowel sounds (to this day I struggle to not break into my suedo-American accent when I run into an American).  And we celebrated Thanksgiving.     
    Now, to be honest, I don't know much about the history of Thanksgiving- I know it has something to do with the early Pilgrims and Native American Indians helping them survive. And the celebration of the first plentiful harvest. And pumpkin and corn.  (I apologise to my American readers for my simplification of the history!). 
    What I DO know is that giving thanks is life-changing.  Focusing on being thankful for what I have instead of what I don't have is part of the key to a contented life. 
Picture
     And because of this, Thanksgiving on the fourth Thursday of  November has become an important part of my own family's annual celebrations.  We make pumpkin pie and a big roast dinner.  We talk about all the good things in our life and we write a letter to God saying thank you for all the things we can possibly think of that we're grateful for.  It usually takes a long time. 
    My thankful list will always include that I got to grow up in such a rich cultural environment with such amazing people and experiences that money can't buy.  And that I've had the privilege of visiting my best friend and her family in America a number of times now.  Some of those trips have been timed to be there for Thanksgiving- to share in this special celebration with my 'second family'. 
    Here's the spread the last time we were there.....
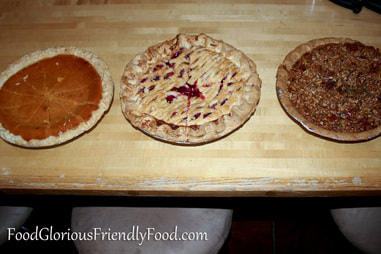
     If you've never tried Pumpkin Pie before, you simply MUST!  It is a sweet, dessert-style pie and even my pumpkin-hating children love pumpkin pie! 
    For the pastry, you can use my Gluten Free Shortcrust Pastry recipe.  I use organic butter when I make this pastry, but if you're strictly dairy free, you can use Nuttelex or another dairy free spread (even though I don't really advocate using the stuff!).  When I need to make a completely gluten AND dairy free pie crust, that does not need a 'lid', I use Jude Blereau's Almond Pastry recipe from her book 'Wholefoods'.  This is the pasty in my pictures, and I will write it out here for you.  The only change I've made to her recipe is that I use coconut oil where she calls for almond oil. 
    Scroll down to the 'variation' right at the end of this post for the grain-free option.
Crust Ingredients:
  • 100g (1 cup) almond meal
  • 260g (1 1/2) cups brown rice flour
  • 125mls (1/2 cup) pure maple syrup
  • 60mls (1/4 cup) Coconut oil (or almond oil)
  • 1 teaspoon natural vanilla extract
  • 1 tablespoon ice cold water
Method:
  • Preheat oven to 200 degrees Celsius (390F).
  • Mix together in a bowl the almond meal and rice flour. 
  • In a separate bowl or jug, whisk together the maple syrup, oil, vanilla and water. 
  • Add the wet ingredients to the dry and mix with a fork.  If it is dry and sandy rather than moist, add a little more ice cold water. 
  • Cover and rest the pastry in the bowl in the fridge for 20 minutes. 
  • Press the dough into desired tin or pie dish with your fingers, smoothing it out as much as possible. Don't leave an overhang of crust over the edge of the dish as it will burn badly due to the length of time the pumpkin filling requires to bake.
  • I usually blind bake my shell for 5 minutes in the preheated oven, as the end product it turns out less 'soggy' if I do.  Cover the pie dish with foil while blind baking to stop the crust from starting to brown. There is no raising agent in this pastry, so no need for baking weights.

    And now for the pumpkin filling.  I had an old recipe given to me in handwritten form by a lady in PNG, that I've modified to make it dairy and refined sugar free....
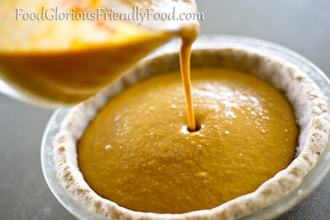
Filling Ingredients:
  • 1 & 3/4 cup cooked, mashed pumpkin /450g/1 American Can of pumpkin.  Start with about 1500g uncooked pumpkin with skin on- you probably won't need all of it but better to have more than less!  Any variety of pumpkin will do.
  • 1 & 3/4 cups milk of choice (I use almond milk)
  • 2 large eggs
  • 1/2 cup coconut sugar or rapadura sugar
  • 1/2 teaspoon ground sea salt
  • 1 teaspoon ground cinnamon
  • 1/2 teaspoon ground nutmeg
  • 1/2 teaspoon allspice
Method:
  • To cook the pumpkin, you can steam it or roast it.  Don't boil it as it will add too much moisture to the end product.  I prefer the flavour of roast pumpkin- gives the pie a little bit of extra richness. To roast it, cut the peeled pumpkin to large cubes and place on a greased or lined baking tray in an oven preheated to 160 degrees Celsius (320F) until just soft and not overly browned.  You can cook the pumpkin a day or two ahead and use it in the filling cold if need be.
  • Set the oven temperature to 200 degrees Celsius (390F).
  • Once pumpkin is cooked and cooled a little, mix it with all the other ingredients until smooth and runny in a food processor or blender, or with an immersion 'stick' blender. 
  • Pour the filling into the blind-baked pie crust.
  • Bake for 40-50 mins, checking to make sure the filling is just set in the middle, but the crust is not over cooking.
  • Remove from oven and cool completely before serving.  It is best served at room temperature or from the fridge.  Serve with whipped cream or yoghurt of choice, sprinkled with a little cinnamon or nutmeg.
Variation:  If you're short on time, or are avoiding grains, this pumpkin filling makes a wonderful little dish served in ramekin pots, without the crust.  Also pour any left over filling that doesn't fit into the pie crust into ramekins and bake.  They will take closer to 30 minutes rather than 40 minutes to bake.
Picture

Banana Flour Slice

17/11/2019

 
Picture
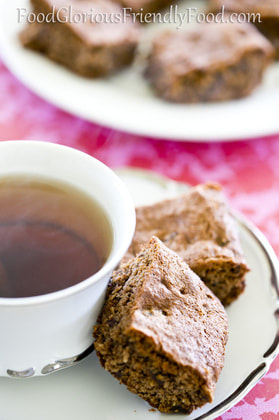
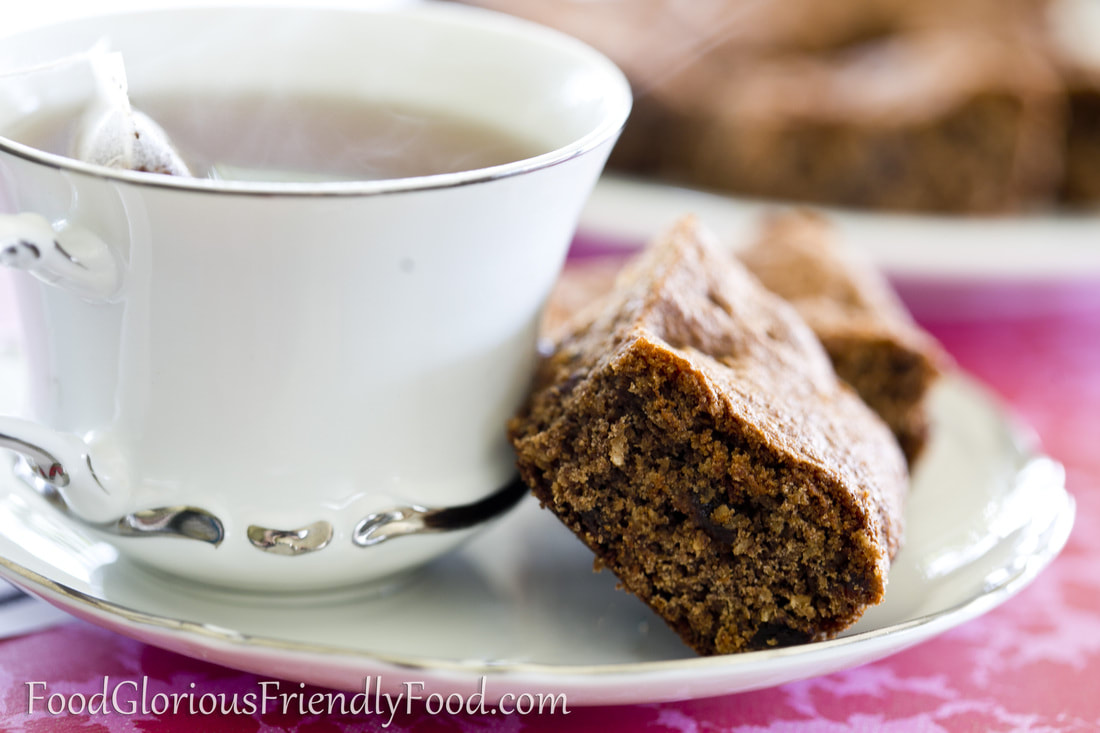
 Gluten free - grain free - dairy free - refined sugar free - additive free - vegetarian
     Banana flour
is a gluten free flour, but has a few advantages over other gluten free flours.  Firstly, it's not only gluten free but also grain free- great for all you Paleo eaters out there!  Secondly, it's not a nut-based gluten free flour- great for those with tree nut allergies).  Thirdly, it's a Resistant Starch.  My attempt to explain what this means is as follows:  Resistant starch is resistant to the digestive enzymes in the stomach and small intestine, so it is not absorbed there like most other starches, and makes it all the way to the large intestine, acting like dietary fibre.
   The benefits of this include:
-keeping your bowels 'regular'
-reducing the chance of colon cancer
-doesn't give your body an instant glucose hit like other starches, and then the associated sugar-low afterwards (ie it's very low G.I.)
-keeps you feeling full for longer
-reduces fat storage after a meal that it is consumed
-promotes increased mineral absorption compared to other starches, especially calcium and magnesium
-promotes good bacteria off the gut (they can feed off it)

    No other food contains as much resistant starch per serve as bananas! Second in the running is rolled oats.
    Unlike many other gluten free flours that require altering recipes drastically to achieve the non-gluten-free comparison, it's easy to replace regular flour in your favourite recipes.  You use 3/4 cup of banana flour for every cup of wheat flour in the recipe, make sure you use baking powder or soda, and add one extra egg (or equivalent soaked chia seeds).
    This recipe was a childhood favourite of mine.  We called it Sultana Slice and it's in a hand-written in a book of recipes I transcribed from my Mum's when I left home.  I've been wanting to give it a gluten/dairy/sugar-free make over for a long time and the banana flour has helped to keep it excitingly close to the original taste and texture. 
     And, by the way, it doesn't taste like banana!  I hope you enjoy it as much as I do!


Ingredients:
  • 1/2 cup (125 g) coconut oil(or organic butter)
  • 1/2 cup coconut sugar
  • 2 teaspoons vanilla extract or paste
  • 2 eggs
  • 3/4 cup banana flour
  • 1/2 teaspoon bicarb /baking soda
  • 1/2 teaspoon baking powder
  • 1 teaspoon cinnamon
  • 1 teaspoon allspice (or add an extra teaspoon cinnamon)
  • 3/4 cup desiccated coconut
  • 1 1/2 cups sultanas (if you don't like dried fruit in slice, you could replace this with 100g chopped 70% cocoa chocolate)
Variation:  if you want to make this slice a little more 'adult', soak the sultanas in Port or Sherry for half an hour before using them (drain the liquid before adding them to the batter).

Method:
  1. Preheat the oven to 180 degrees Celsius / 350F  (160C fan forced).
  2. Line a small rectangular or square slice tin with baking paper. (about 19 x 28cm)
  3. In a large saucepan, melt the coconut oil or butter.  While hot, stir in the coconut sugar and vanilla.
  4. Lightly beat the eggs with a fork in a separate bowl and add to the oil mix in the saucepan.
  5. Add the flour, bicarb soda, cinnamon, allspice, desiccated coconut and sultanas. 
  6. Mix very thoroughly until as smooth as possible.
  7. Spread into the lined tin and smooth out the top.
  8. Bake for 10 minutes, then cover with foil and bake a further 10 minutes.  Do not overcook as it can get very dry and crumbly!
  9. Remove from oven and allow to cool for a few minutes.  This slice is yummy served warm with some dairy free ice cream and caramel sauce for dessert, or it's great once cooled as a morning or afternoon snack.
  10. Store in an airtight container.
Picture
<<Previous

    Categories

    All
    Baked
    Beef
    Biscuits And Slice
    Breakfast
    Cakes Muffins Brownies
    Chicken
    Chocolate
    Christmas
    Dinner
    Dips And Sauces
    Drinks & Ice Blocks
    Easter
    Fruit
    Lunch
    Lunch Boxes
    Meat
    Paleo
    Pastry
    Pork
    Preserves
    Raw
    Salad
    Seafood
    Snack
    Soup
    Sweet
    Vegetarian

    See my book:  friendly food for chocoholics
    Weight and Temperature Conversions
Proudly powered by Weebly
  • Home
  • Recipes
  • About Me
  • Weight and Temperature Conversions