FOOD, GLORIOUS FRIENDLY FOOD
  • Home
  • Recipes
  • About Me
  • Weight and Temperature Conversions

 Food, Glorious Friendly Food  

Recipe Categories

All
Baked
Beef
Biscuits And Slice
Breakfast
Cakes Muffins Brownies
Chicken
Chocolate
Christmas
Dinner
Dips And Sauces
Drinks & Ice Blocks
Easter
Fruit
Lunch
Lunch Boxes
Meat
Paleo
Pastry
Pork
Preserves
Raw
Salad
Seafood
Snack
Soup
Sweet
Vegetarian

Friendly food for Chocoholics

CoConut Jam Cupcakes

14/8/2019

 
Picture
Picture
Gluten free - dairy free - refined sugar free - nut free
    These are a wonderful gluten and dairy free cupcake, full of the goodness of coconut and absolutely scrumptious fresh from the oven. I've served them for dessert, with heated fruit-juice-sweetened strawberry jam as a 'topping', and they also freeze really well to add to school/ work lunch boxes later on. As usual, I make a double batch (actually, with this one I usually make a triple batch!) so there are plenty for later.   
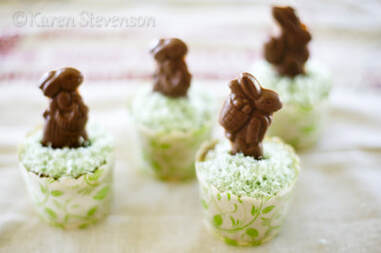
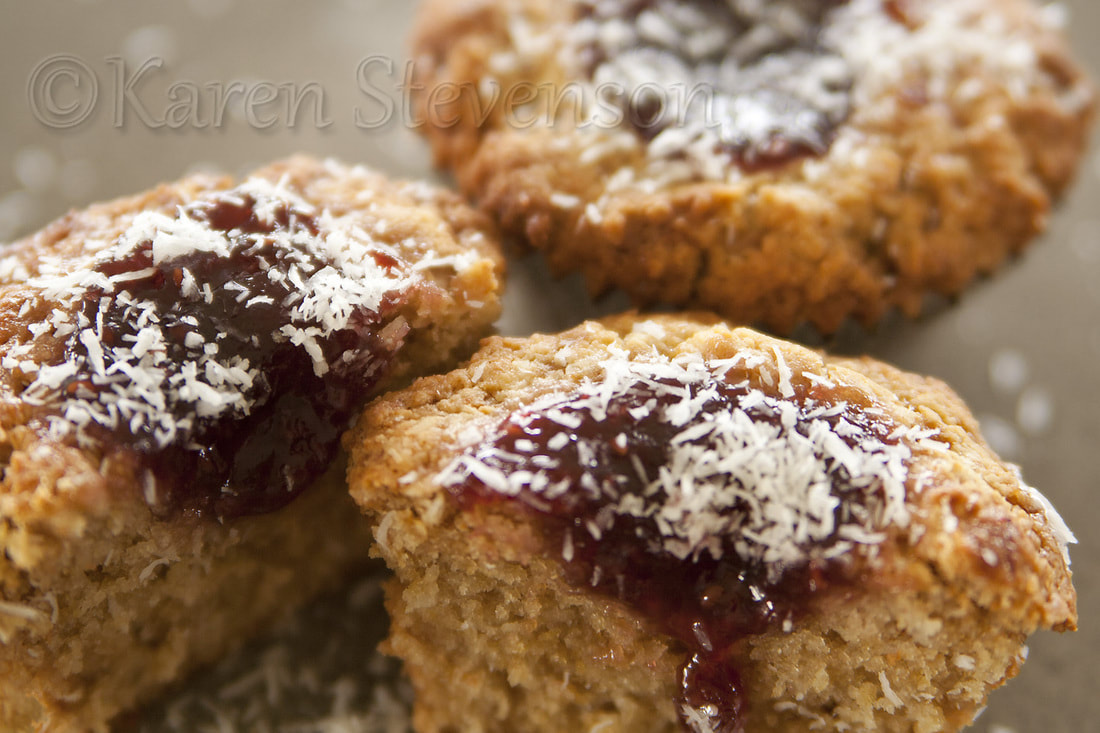
    I thought I'd do this one with a little Easter twist as well. After the cupcakes have cooled, ice them with Cashew Cream or butter icing, or just spread them with fruit-juice-sweetened jam, then sprinkle with a little dessicated coconut that's been stirred around with some natural green food colouring, and pop a chocolate bunny on top. A fun and not-too-chocolately treat for the kids for Easter-week snacks. Check out my Make Your Own Easter Eggs post for how to make the bunny!
    I love baking them with the strawberry jam inside them, but they're also yummy without it. Raspberry or cherry jam would also be scrumptious!
    
Ingredients
  • 125mls of coconut oil (or a nut based oil like almond or macadamia if you don't have coconut)
  • 125mls of milk of choice- almond, soy, rice (or dairy if you're able)
  • 2 eggs (or egg replacer)
  • 1 teaspoon of pure vanilla extract or paste
  • 220grams gluten-free plain flour mix (or spelt flour if you don't have to be gluten-free)
  • 100 grams (2/3 cup) rapadura sugar
  • 2 teaspoons baking powder
  • 1/4 teaspoon sea salt
  • 1/2 cup organic desiccated coconut, plus1 tablespoon reserved for dusting
  • 1/2 cup of fruit-juice-sweetened (refined sugar free) strawberry jam

Method
  • Preheat your oven to 180 degrees Celsius. Line a muffin tin with 12 paper cases.
  • In a large bowl, mix the flour, sugar, baking powder, salt and 1/2 cup coconut with a large spoon.
  • In a separate bowl or jug, whisk together the oil, milk, eggs and vanilla
  • Pour the wet ingredients into the dry and fold together with a large spoon until just combined.
  • Using an ice cream scoop, place one scoop of mixture into each paper case.
  • Optional, if using jam: Using the back of a teaspoon, make a deep well in the centre of each scoop of mixture, and fill with about a teaspoon of jam.
  • Bake for about 25 minutes or until a skewer pushed through the centre comes out clean (you'll have to go in through the side to avoid hitting the jam). Sprinkle the reserved coconut on the top.
The cupcakes below were cooked in a molded silicon muffin tray, that I lined with jam in the bottom, and inverted them after cooking.
Picture

Chocolate RaspBerry Mousse

14/8/2019

 
Picture
Picture
Gluten free - dairy free - egg free - low in refined sugar
     You may have picked up by now that I have a thing for chocolate...I can't help it! Every time I see a new recipe that can be converted to gluten and dairy free, and that I can use some of my always-plentiful stash of 70% dark chocolate in, I just have to try it. I was given a new recipe book for Christmas:- “Fast and Flavorful Meatless Meals” by Jessie Price, and have been slowly trying new recipes. This weekend it was time for the Chocolate Raspberry Pie! And hey, it's nearly Easter, so chocolate is very appropriate!
     Now, you're bound to scroll down to the ingredients list before long, so I'll get this bit out of the way straight-up: the filling is based on tofu.   Yep, tofu.  I'm not an avid tofu eater..... I don't regularly cook with it as it kind of scares me, as unfamiliar things tend to. But I'm always happy to try something at least once! I had the recipe book open and was just starting to get ingredients together when my tofu-skeptic husband came by and glanced at the recipe.
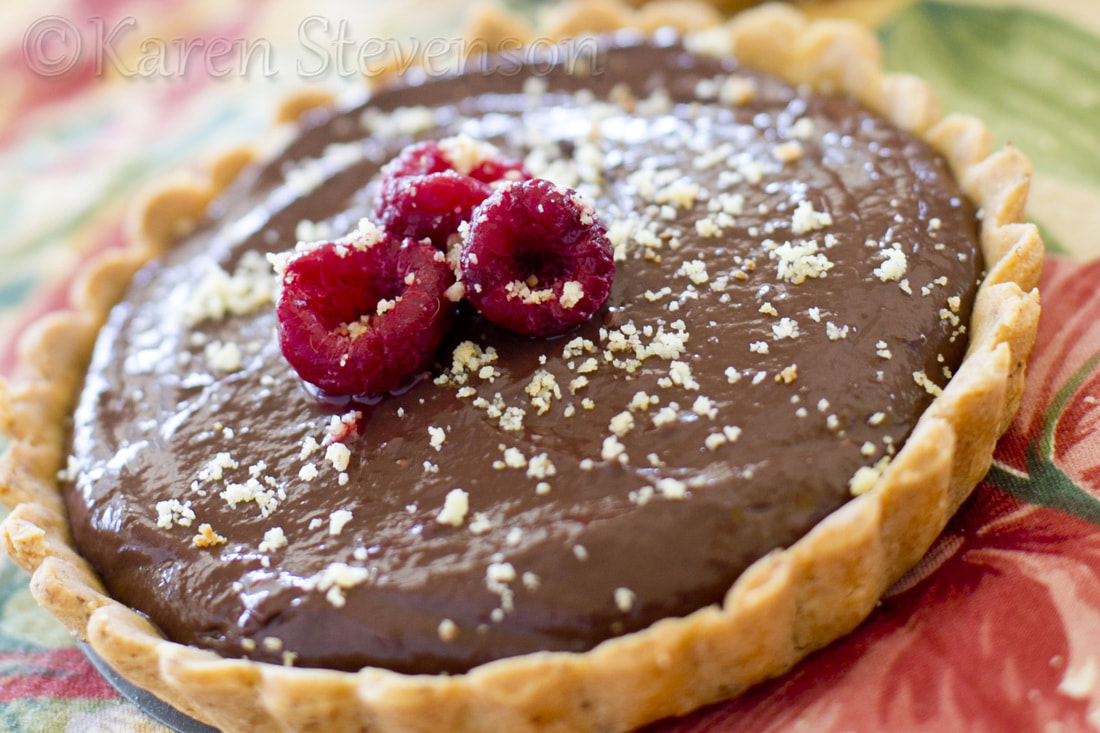
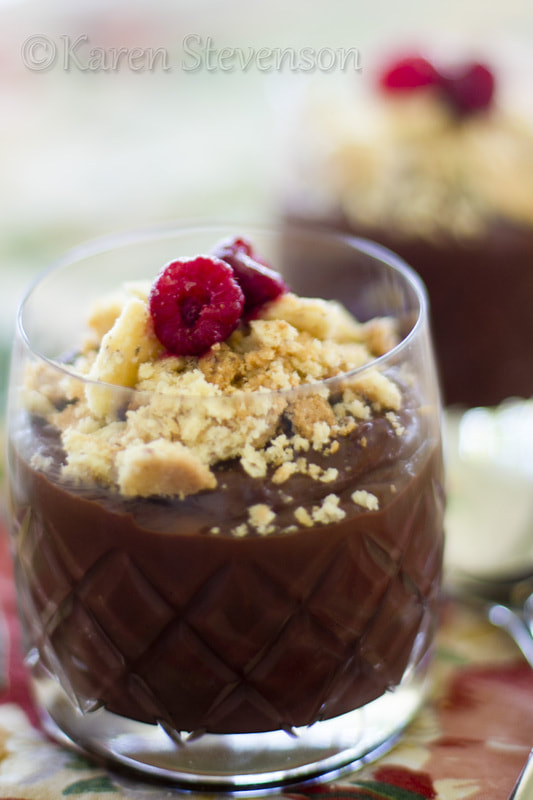
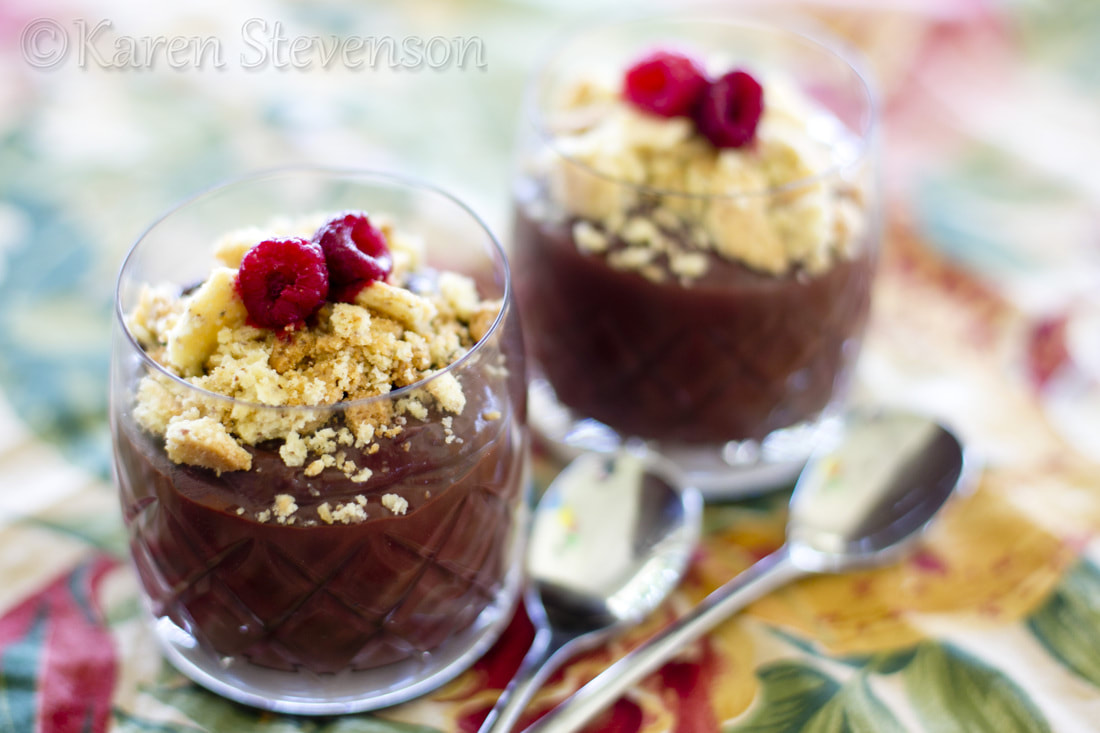
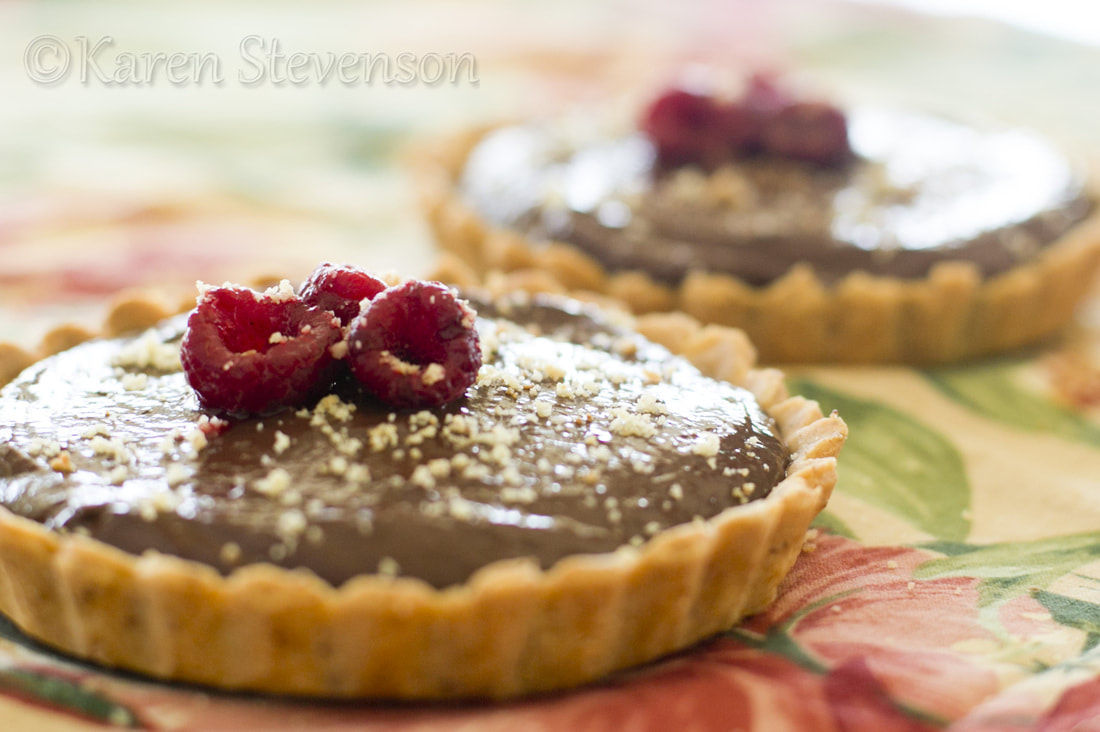
“Tofu????” he exclaimed! “Just give it a go” I replied, and we left it at that. Once I'd whizzed it all up in the food processor he came by again, as he often does, just to 'check' how it's going (ie to see what there is to sample), and he had a lick of the mixture. Obviously surprised, he went back for more. My not-very-sweet-toothed husband has now had three helpings of the 'tofu pie' over the last two days, so I think I can safely say it was a success. It's also been a huge hit with my 7 year old who is a self-professed mousse-hater. Not bad, really!
     The pie filling is a gorgeous stand-alone mousse and actually doesn't have to be served in a pie shell at all. We ate a heap of it fresh after being whizzed up, and it's just lovely. It solidifies in the fridge after a couple of hours and becomes too solid to really call a mousse, but if you wanted to make it ahead of time and serve it as a mousse, just take it out of the fridge for an hour or two before serving.
     And, just to demonstrate that I don't always get my baking quite right, my attempt at making a large pie shell to put the filling in kind of failed. I made the the dough a little too moist, and rolled it out too thinly, and it ended up cracking to bits when I blind-baked it. Thankfully I also made some small tart shells that worked, so it wasn't a complete disaster. And remembering the old saying “when life gives you lemons, make lemonade”...I found that the crumbling pie crust made a fantastic and fancy-looking 'soil' to crumble over the top of the mousse, and gave it a lovely crunchy texture-element. Hubby even said it looked like I planned it all along!As usual, I've modified the original recipe somewhat. It's an American book, so the quantities have changed a little in my conversions so that it uses more standard Australian quantities. I've also removed the refined sugar content and replaced it with a reduced amount of maple syrup.

Ingredients
  • 300 grams fair trade dark (70% or more) chocolate (or about 1 1/2 cups dark choc chips if you prefer)
  • 300 gram package of organic firm silken tofu (original recipe states 1 1/3 cups)
  • 3 tablespoons pure maple syrup (or rice malt syrup or agave if you don't have maple. Raw honey would probably work too)
  • 1 teaspoon vanilla extract or paste
  • 1 cup frozen raspberries, thawed
 
  • 1 quantity of Shortcrust Pastry, or other pie shell

Method
  • If making a pie, preheat oven to 200 degrees Celsius.
  • Roll the pastry to the size of your pie dish on a silicon baking mat or on baking paper. Grease your pie dish. Invert the paper over the dish and lightly press the pastry into the dish. Make sure pastry comes right up over the edge of the dish, as it will shrink a little when baking. Blind-bake using baking weights for 20-25 minutes, checking to make sure it's not over-browning. It must be fully cooked, as the filling will not be baked in the shell.

While the shell is cooling, make the filling:
  • Melt the chocolate in a double boiler (place a glass or ceramic bowl over a saucepan with a little water in the bottom ; bring the water to the boil, then turn down to low temperature ; the steam from the water heats the bowl and melts the chocolate). Stir the chocolate as it melts, until it is completely smooth.
  • In a food processor, blend together the tofu, maple syrup, and vanilla. Add the raspberries and process. Scrape down sides and process again until completely smooth.
  • Add the melted chocolate and process again, scraping down sides until fully incorporated.
  • If serving as a mousse, spoon into individual glasses or small mugs and serve at room temperature. Top with crumbled cooked pastry 'soil' if desired. Garnish with raspberries.
  • If making a pie, spoon the mousse into the cooled pie shell and refrigerate at least 2 hours, until firm. Garnish with raspberries.

Make Your Own Easter Eggs

9/8/2019

 
Picture
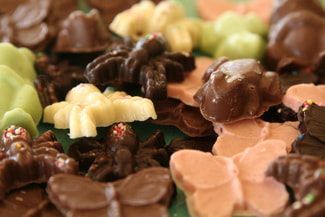
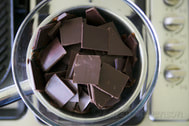
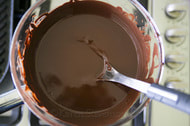
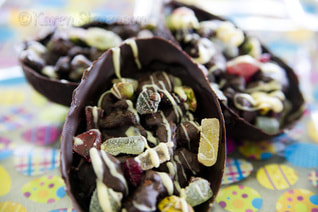
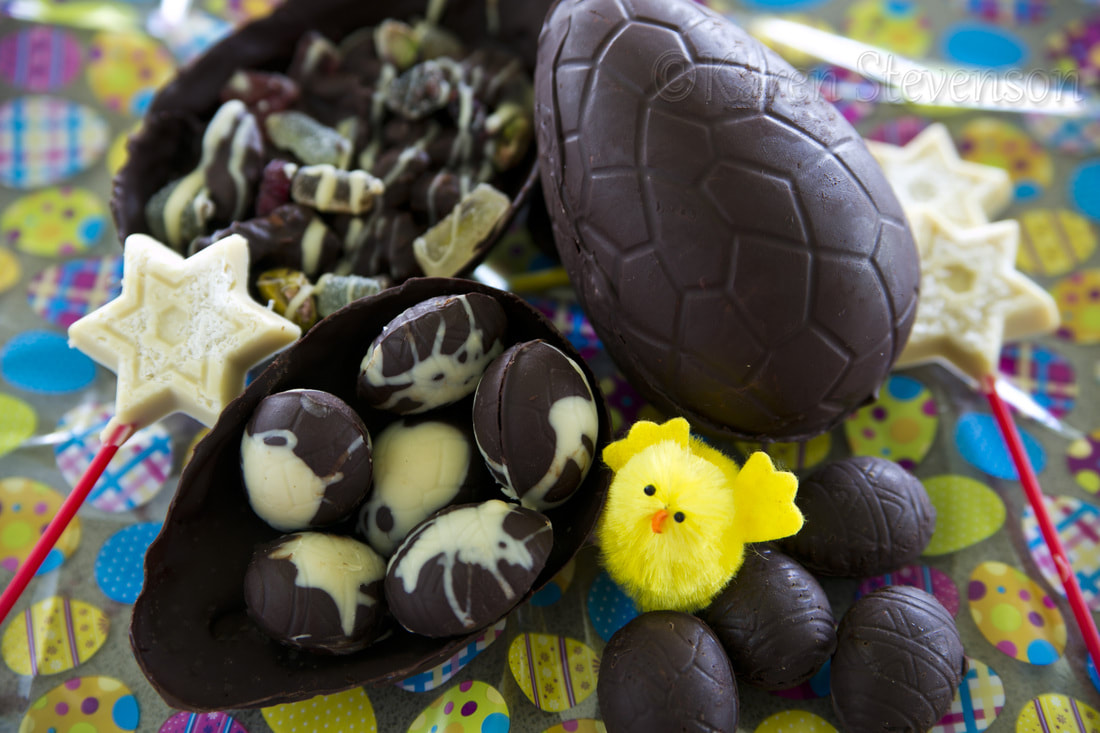
  We have been making our own Easter Eggs for years.  For me it's partly nostalgic and partly pragmatic.
     I have wonderful memories of Easter creativity during my years growing up in Papua New Guinea. It was hard to buy Easter Eggs over there, so we would make our own for each other. We would draw a name out of a hat to decide which family member we would make a large egg for. Then we would secretly decorate the egg with piped-on icing, with pictures or a message to surprise them on Easter Sunday.
   The pragmatic part is that it can be really hard to buy Easter Eggs that meet all my requirements: Fair Trade Chocolate, no dairy, low sugar, low additive AND affordable. I also really enjoy the act of giving something you've laboured over yourself, rather than something just picked off a shelf, and my kids really enjoy the variety that they get every year.  We now have an Easter Egg making day a week or two before Easter- everyone makes a bunch and then divides them up into gift bags for the other family members, waiting for Easter Sunday.
     It's not a difficult process, just a little time consuming. First you need the egg molds. They can be found in many places over the internet (ebay is a good place to start). In Australia, stores like Spotlight or specialty baking stores have them. I have a variety of molds- large hollow eggs, medium and small solid eggs, plus bunny shapes and other non-Easter themed molds of various insects and animals and shapes. You can also buy different coloured foil wraps for that more authentic looking product at the end.

Ingredients
    Chocolate!! Any kind works for this, depending on personal preference and your dietary requirements. The quantities are entirely up to you...buy a few blocks and keep melting more if you run out!!
    You can make different colours by using dark chocolate, milk chocolate, white chocolate, or white chocolate coloured with a few drops of natural food colouring (to make pink, blue, green, yellow, purple etc).
     You can also use different flavoured chocolate- I often do a batch of mint chocolate and another of orange chocolate, to add a great variety of flavour.
Method for melting chocolate:
  • Melt the chocolate in a double boiler (place a glass or ceramic bowl over a saucepan with a little water in the bottom ; bring the water to the boil, then turn down to low temperature ; the steam from the water heats the bowl and melts the chocolate).
  • Stir the chocolate as it melts, until it is completely smooth.

Method for small or medium solid eggs:
  • Pour the melted chocolate into the molds. Make sure the chocolate comes to the top of each mold and is smooth and flat on top.
  • Reserve a little chocolate for sticking the two halves together later. Set in the freezer or fridge till COMPLETELY solid. You will know if they're ready because they will pop easily out of the mold. If there is some resistance, they are not ready.
  • Once you have popped them out of the molds, spread a little of the reserved chocolate on one half of an egg and press the other half onto it. Repeat for all eggs and return to fridge until the 'paste' has set the two halves together.
  • If you want to make a multi coloured egg, drizzle some melted chocolate of one colour into the bottom of the mold and refrigerate till set. Fill the rest of the mold with the other colour and set as per previous instructions. You could also do this with thin layers of chocolate, setting each colour as you go, making 'stripey' eggs.
Method for large hollow eggs:
  • These are more tricky and time consuming. I place my molds in the freezer and take them out right when I'm ready to use them, as it helps the chocolate set a little more quickly and not run down the sides so much.
  • Melt your chocolate and allow to cool to room temperature so it thickens a little. I have also found that adding a little alcohol helps the chocolate to thicken and is much easier to spread into the molds (of course this will also add flavour to the chocolate, so choose wisely- I usually go with either an orange liqueur or mint liqueur. This works excellently if you've already used those flavours of chocolate. Rum would work too, for plain dark chocolate).
  • Remove mold from freezer and spoon some chocolate into the base. Swirl around by tipping the mold around or using the back of a spoon to spread it. Coat the whole mold, and pour out any excess chocolate that has pooled in the bottom. Return to freezer till set (about half an hour).
  • Repeat this process three or four times until you have a nice thick egg with a thick edge on the top. On your last time, leave it in the freezer for a couple of hours. When ready, the egg should easily tap out of the upside down mold.
  • Use a little melted room-temperature chocolate to smear around the edge of one of the half-eggs and place the other half on top to 'glue' them together. Place in fridge until they are set together.
  • You can also put some surprises inside the egg before you join the two halves together. Try lollies, dried fruit, other smaller chocolates, or a hand written note.

Method for Rocky Road Easter Eggs:
  • Make a half-shell of a large hollow Easter egg, as per the instructions above.
  • Mix up a batch of Rocky Road (check out my version here), and leave to cool down to room temperature in the bowl.
  • Once the half shell is completely set, spoon some of the room temperature rocky road mix into the shell and place in the fridge to set. Drizzle some more chocolate over the top if desired.
  • Wrap in foil if desired.

    Categories

    All
    Baked
    Beef
    Biscuits And Slice
    Breakfast
    Cakes Muffins Brownies
    Chicken
    Chocolate
    Christmas
    Dinner
    Dips And Sauces
    Drinks & Ice Blocks
    Easter
    Fruit
    Lunch
    Lunch Boxes
    Meat
    Paleo
    Pastry
    Pork
    Preserves
    Raw
    Salad
    Seafood
    Snack
    Soup
    Sweet
    Vegetarian

    See my book:  friendly food for chocoholics
    Weight and Temperature Conversions
Proudly powered by Weebly
  • Home
  • Recipes
  • About Me
  • Weight and Temperature Conversions